Documentation
Copilot Integration of an Azure Bot as Skill
In this section we will integrate the RheinInsights Retrieval Suite as a Copilot skill. This way, you can easily and securely chat with your data. This means that as with the search experiences we use security trimming for making sure that no knowledge is exposed, the user does not have access to.
When using skills in Copilot, users always need to be quite precise in querying the skill. Similar to searching for Graph connected knowledge, Copilot needs to be pushed a bit in using a skill. Like “use a skill to search for <questing to be answered>”.
Prerequisites
Please make sure that you configured an Azure Bot in the same tenant, your Teams belongs to, following the documentation at Azure Bot Configuration .
Please make sure that no self-signed certificates are used by the Suite
Downloading the Skill Manifest
Open the RheinInsights Retrieval Suite Admin UI
Go to Query Pipelines > Bot Integrations

In the links section below find your bot, you want to integrate into Copilot. Click on Copilot Skill Manifest and make a note of the URL.
Configure the Entra Id App
Behind your bot is an Entra Id app (see Teams App (Bot) Registration ). The Home page URL must match the skill endpoint. Therefore
Open https://portal.azure.com
Open Entra Id > App Registrations > Click on your Bot app
Click on Branding & properties
Add as Homepage URL the URL from Step 3 (or the publicly available version of this URL)
Click on save
Configuring the Skill
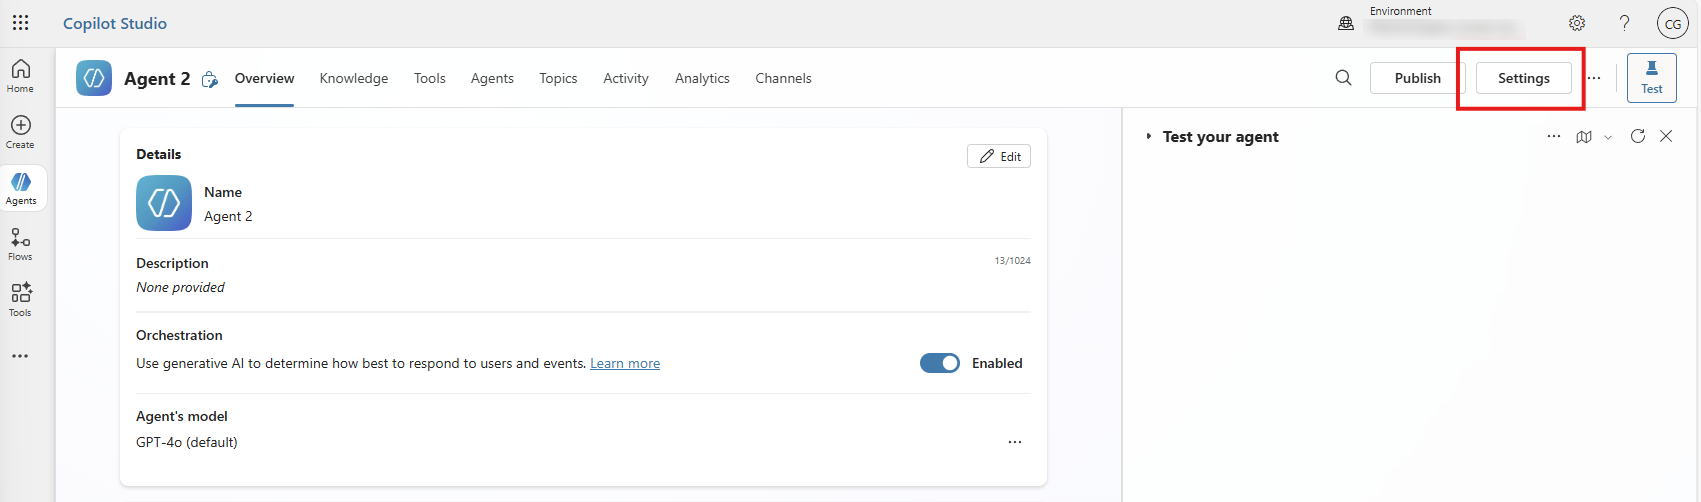
Go to Copilot Studio
Open an existing or create a new agent
Click on Settings
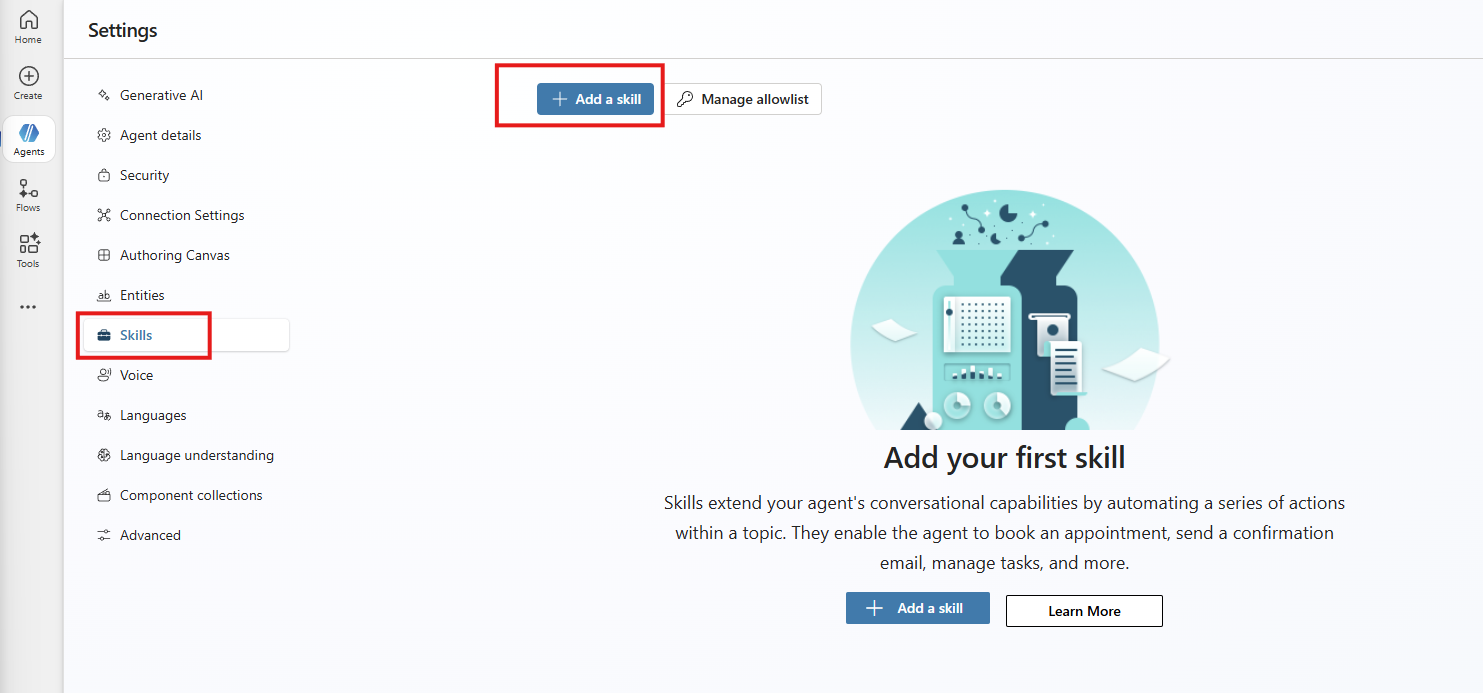
Click on Skills
Click on Add a skill
Choose the correct URL to the skill manifest. See step 3 in the RheinInsights Configuration above. Here the URL must be accessible from the Microsoft Cloud. This URL must match the one in the Entra app, as described in Entra Id section above
If the validation runs into issues then please refer to the Microsoft documentation.
A successful outcome is
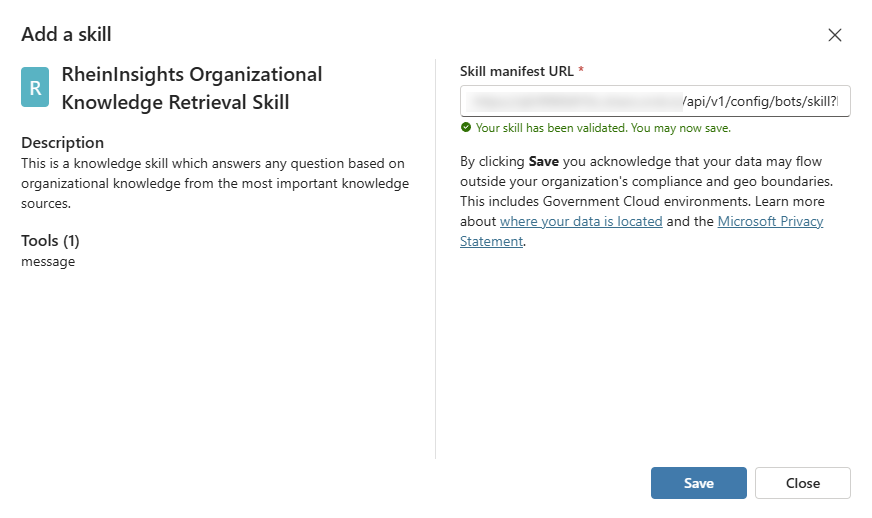
Click on save and after saving close the dialog by clicking on close
Close the settings by clicking on the X in the right hand side upper corner
Click on topics
Add a topic
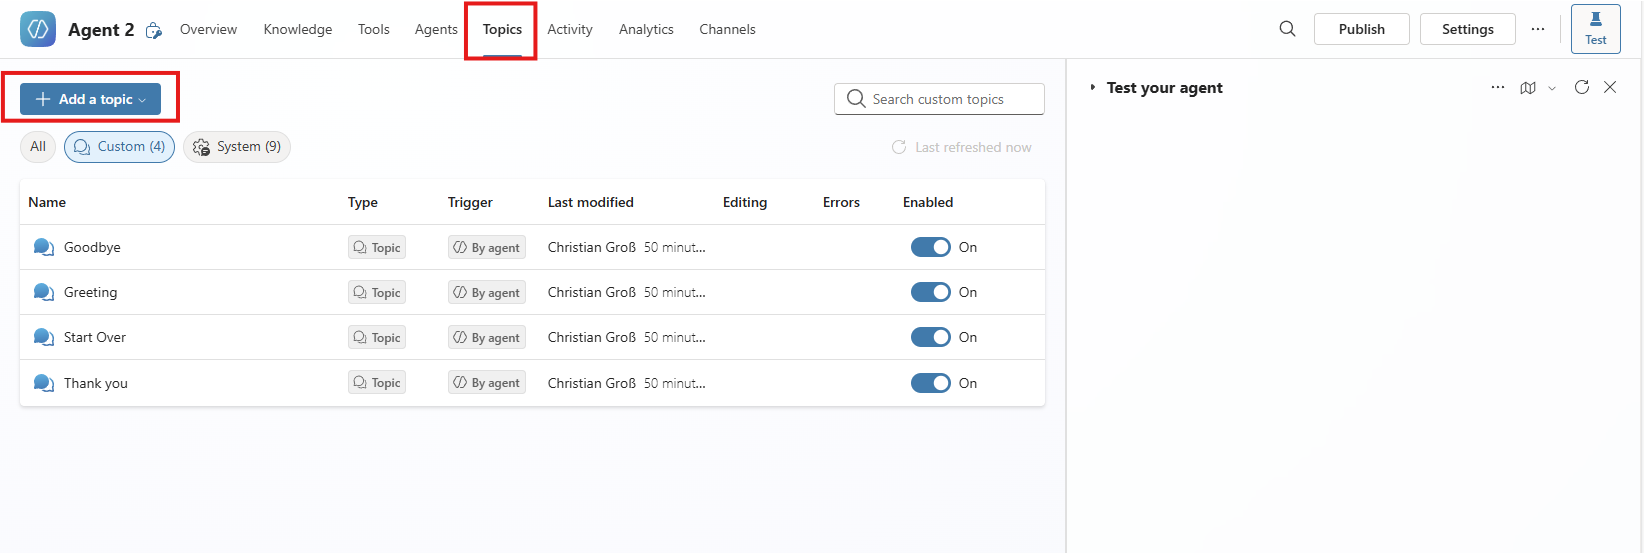
Choose from blank
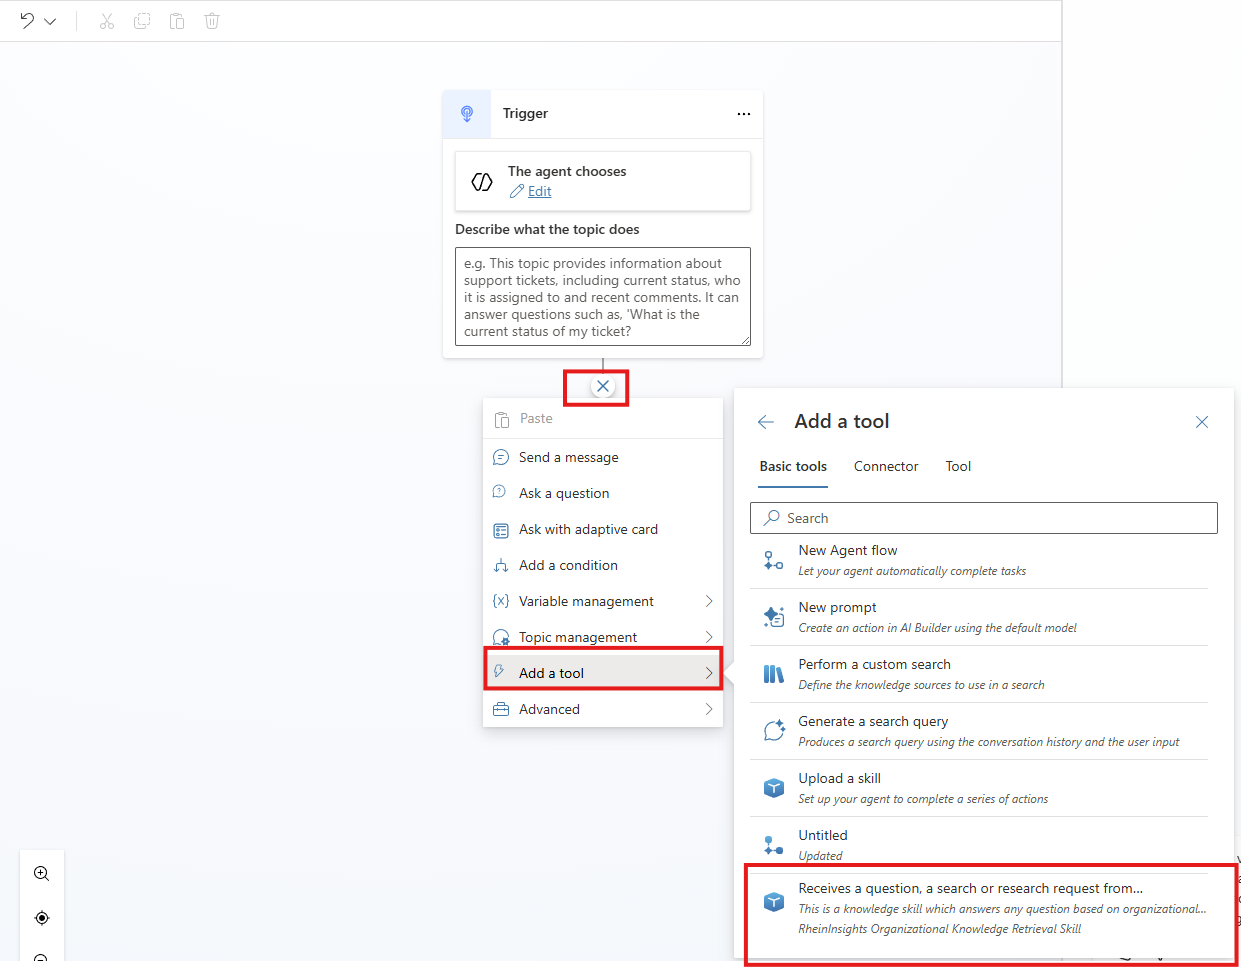
Click on the plus at the arrow
Choose add a tool
And in the dropdown the Research tool from RheinInsights is listed now
Click on save
As a topic use a reasonable keyword. This will be used to trigger the search.
Save the topic
Then you can test search for instance via the Test your agent dialog on the right hand side:
”Use organizational search to find an answer to <your question>”
Troubleshooting
Duplicate Copilot Responses
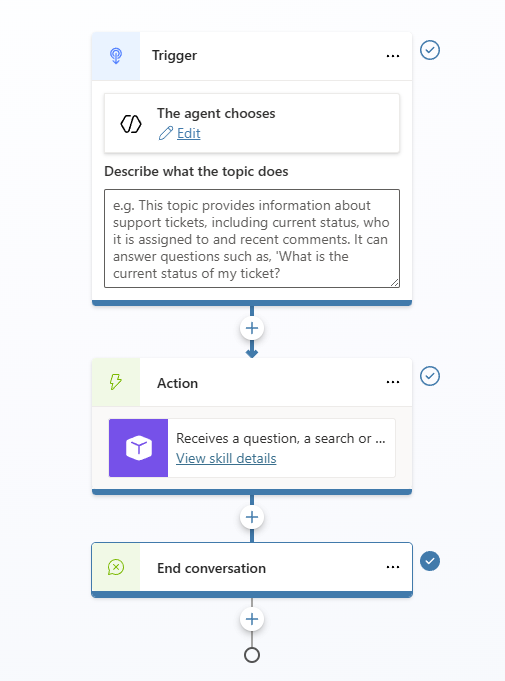
Observation: When working with the skill, Copilot agent produces two answers. First it is the response from our Retrieval Suite, i.e., the original tool response. Then in a second step, Copilot summarizes the just posted response.
Solution: Instead of including the Retrieval Suite as a Tool, you should include it as a topic which always triggers. As the only step, the topic calls the RheinInsights Tool and afterwards it must end the conversation. See the following workflow:
Deployment Issues
Issue 1
Observation: When trying to fetch the skill manifest, the message “We ran into problems getting the skill manifest.” is shown. The network trace console shows for this call the message statusCode: 404. See the following screenshot:
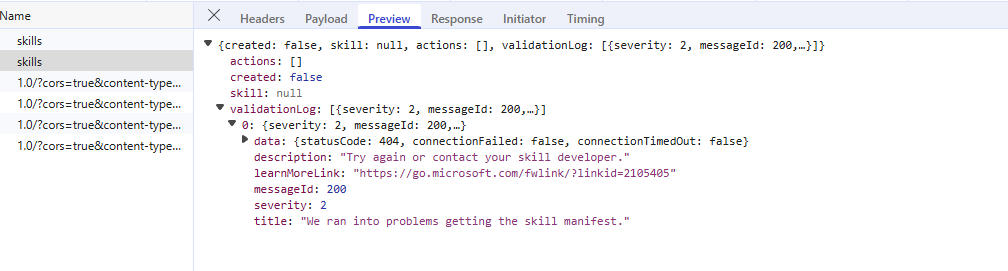
Possible solution: The URL is actually not accessible from the Microsoft network. Make sure that the URL can be reached from the outside (e.g. by adjusting your firewall settings).
Issue 2
Observation: When trying to fetch the skill manifest, the message “We ran into problems getting the skill manifest.” is shown. The network trace console shows for this call the message statusCode: 404. See the following screenshot:
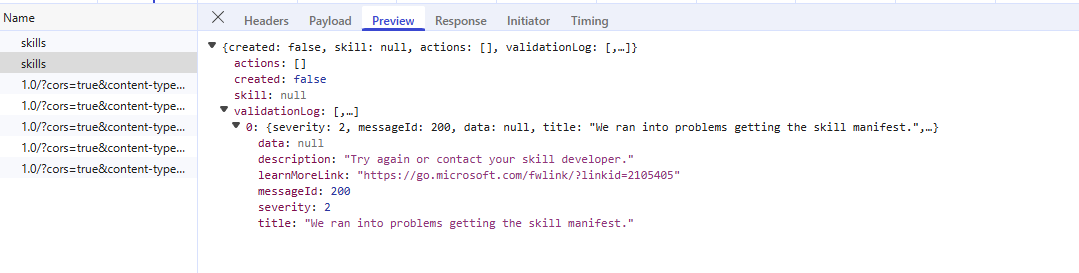
Possible solution: The URL is accessible but might produce the wrong content type or the URL is accessible but comes with a self signed certificate. Make sure that the URL can be reached and that the content type is application/json. Also make sure that the SSL certificate is certificate by a well-known root-authority.
Issue 3
Observation: When trying to fetch the manifest, Copilot Studio displays “Something went wrong while validating your skill. Please try again later” and browser console shows { "ErrorCode": 500, "ErrorMessage": "No credentials provided. (Parameter 'existingCredentials')", "DiagnosticsMessage": null, "ErrorInfo": null }
Possible Solution: In this case, it might be helpful to create a new agent from scratch and try again.